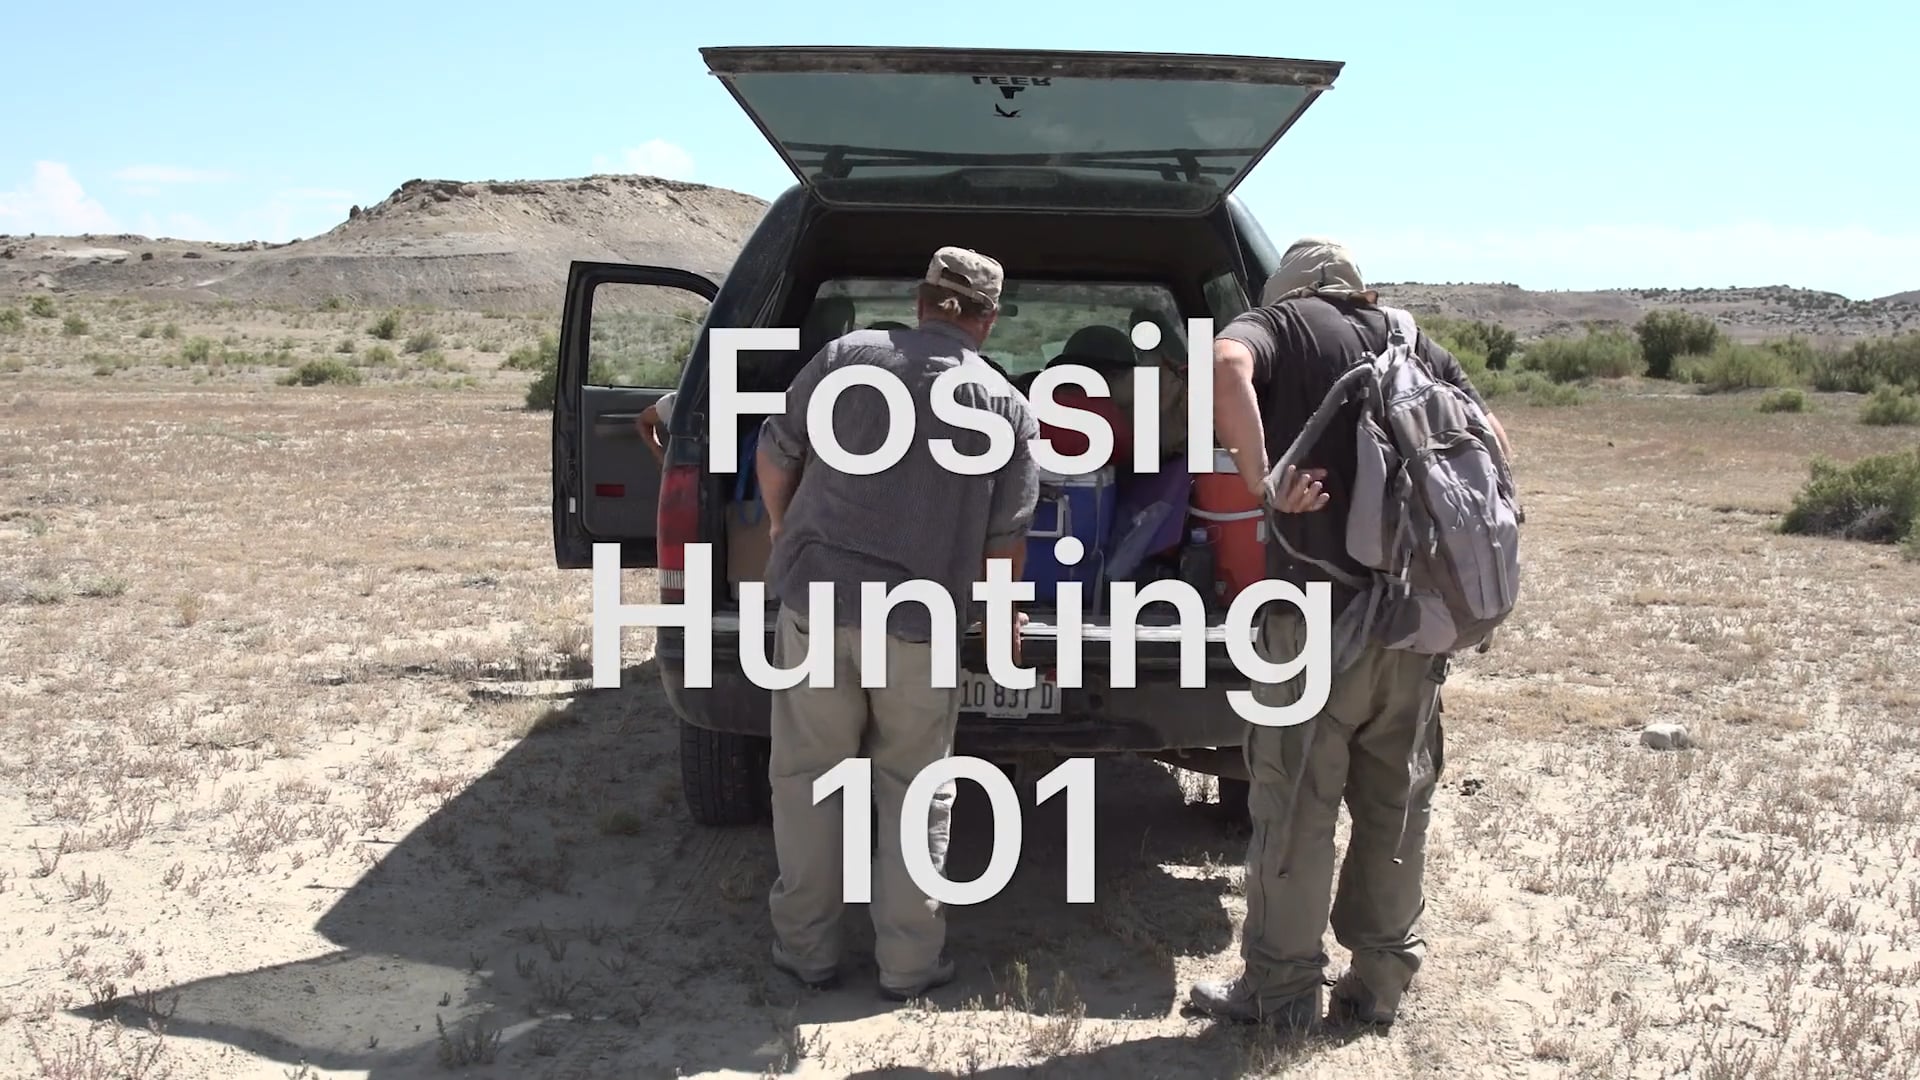
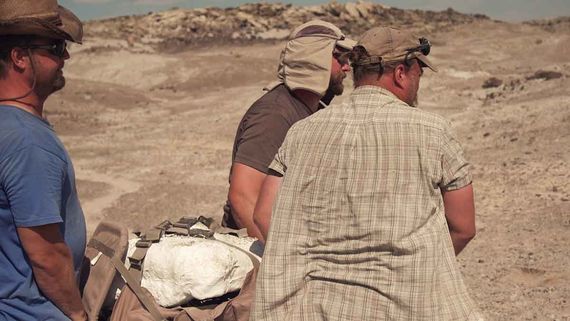
While going on an expedition to search for fossils may sound glamorous, it involves a lot of hard work—sometimes in pretty extreme environments. Of course, it’s very rewarding when you find something, especially an entirely new species of dinosaur. From Antarctica to Patagonia to Utah, Field Museum paleontologists have been all over the world.
Curator of Dinosaurs Pete Makovicky and Chief Preparator Akiko Shinya walk us through the key steps of finding a fossil, digging it up, and then getting it from the field to The Field Museum.
1. Prospect
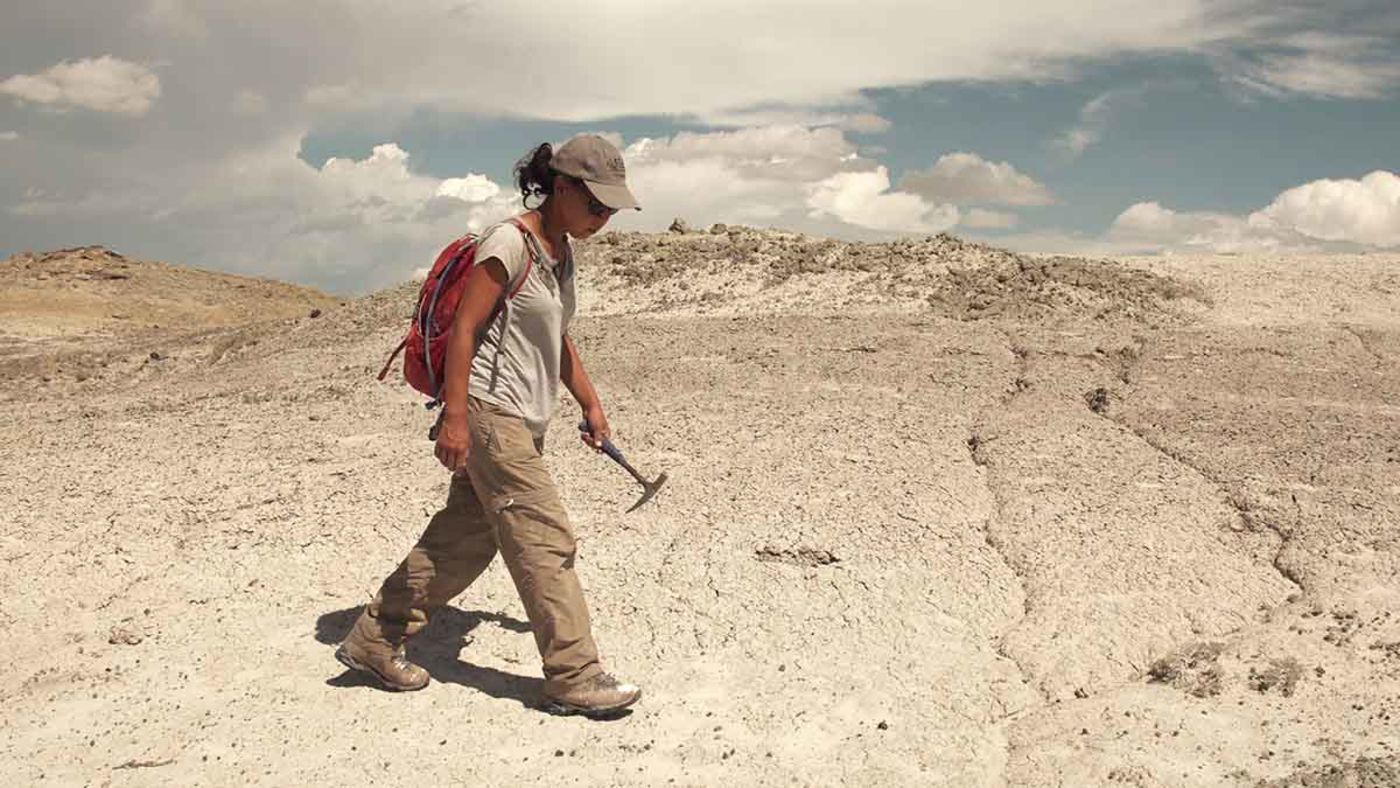
The first step is to get the lay of the land—a lot of land. We typically look for fossils in desert areas, where there’s sedimentary rock instead of metamorphic or igneous rock. A main rule for determining where to search is geologic age: if you know the age of the rocks in an area, you can begin to search for animals that lived during that time. We use a geological map that shows the age of the rock in a particular area. On an expedition, team members will often split up to cover more ground. The goal of prospecting is to explore a huge area where fossils may be found to locate individual sites where there’s something worth digging up.
2. Excavate
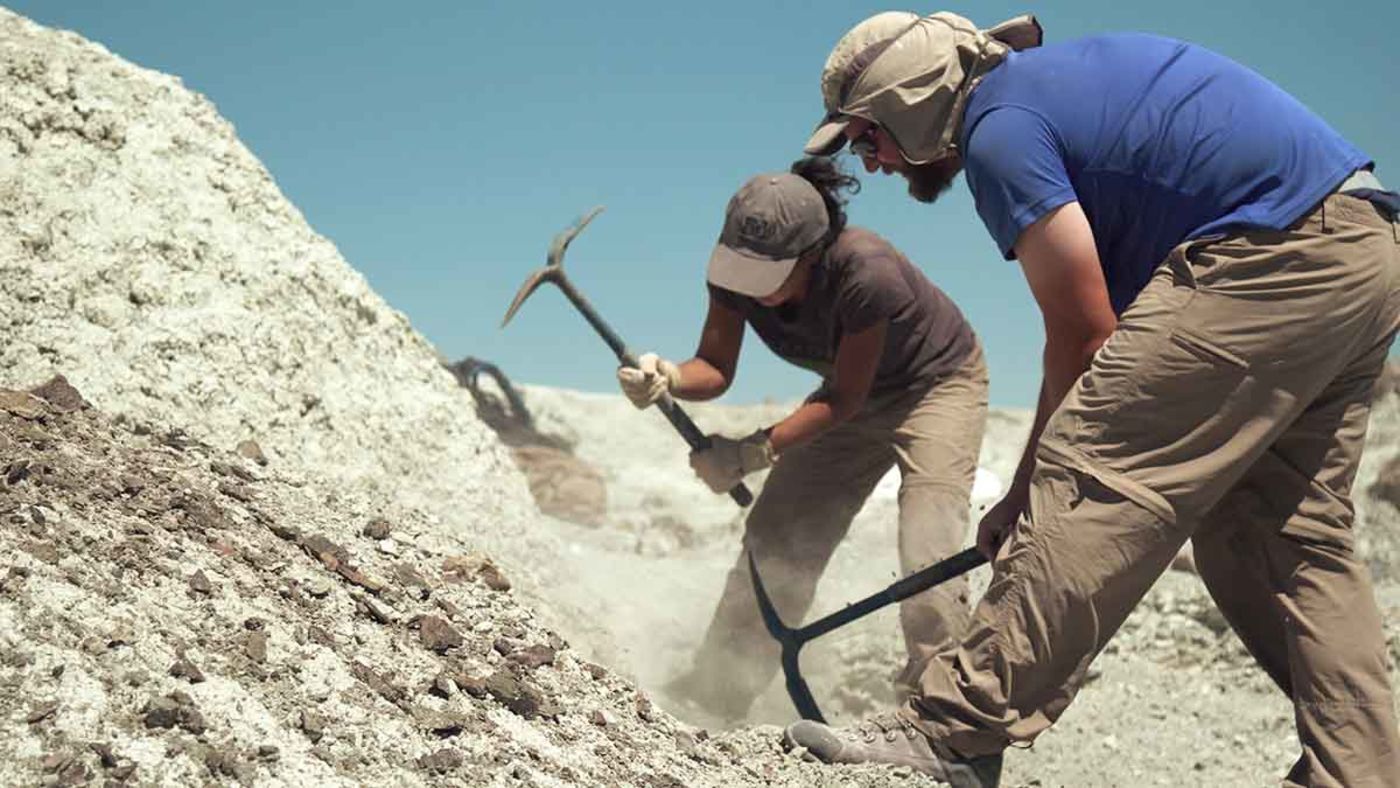
It can take a day or weeks to uncover a fossil, and sometimes multiple field seasons are required. It depends on how hard the rock is and how much overburden there is (rock or soil covering the fossil). When we uncovered part of a new species of oviraptorosaur (a toothless theropod dinosaur) in 2012, it took us three days of jackhammering to remove the overburden and a week to excavate it. There’s also a lot of equipment involved in excavating fossils: we might use pickaxes, rock hammers, chisels, whisk brooms, trowels, and shovels to remove the matrix (rock surrounding fossils). If there’s a lot of rock above the fossil, we use a gas powered jackhammer to remove the overburden—which we did at the oviraptorosaur site.
3. Map the dig site
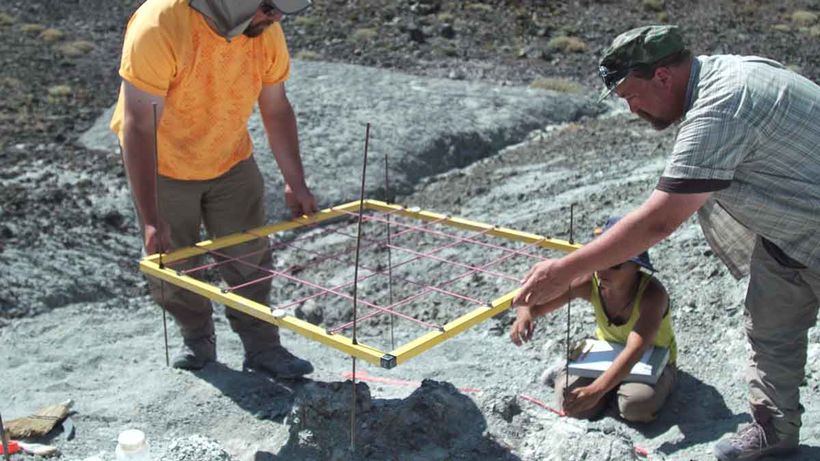
Once we uncover more of the fossil and have a sense of its outline, we’ll lay a grid over a specimen and draw all visible bones on grid paper with the number and description of every bone. The goal is to document the original position the bones were in when we found them.
4. Make plaster jackets
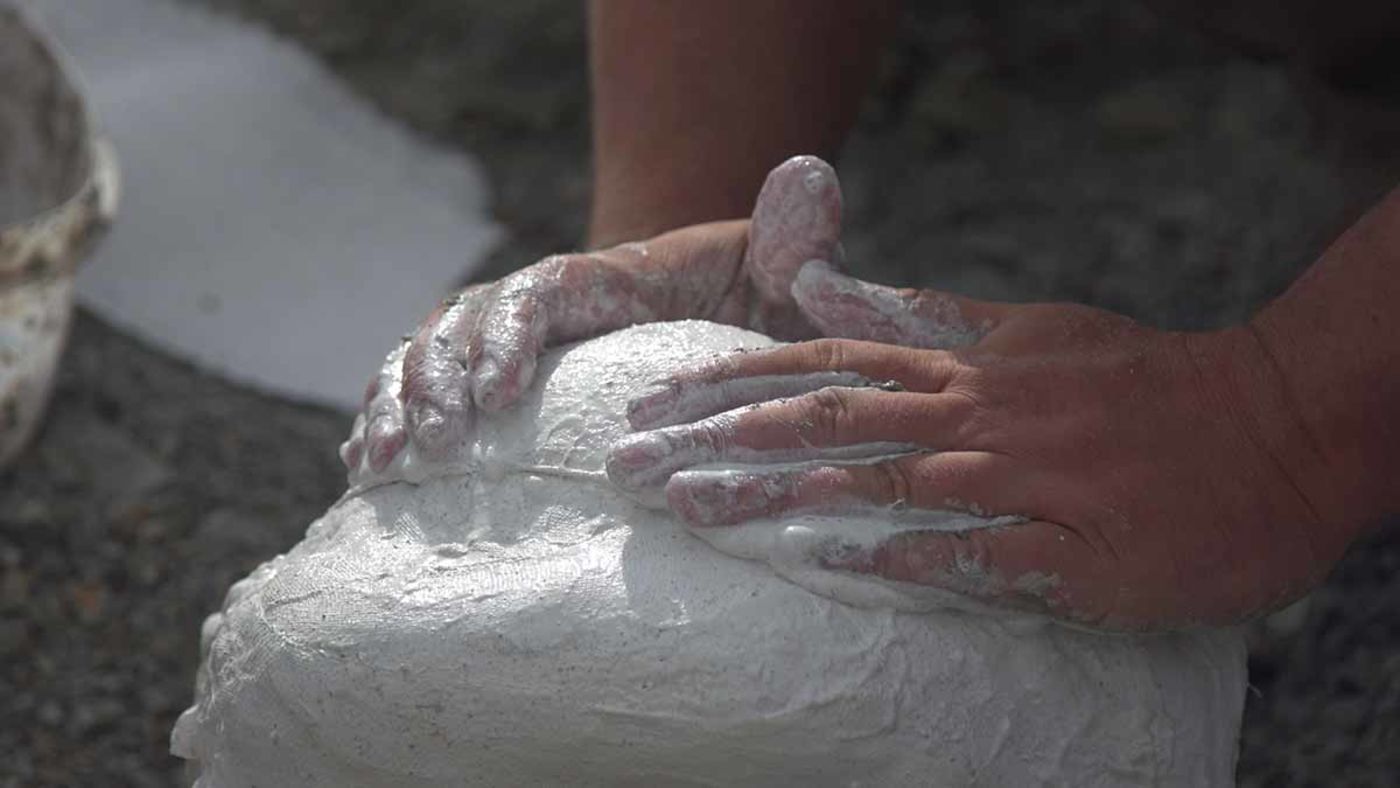
To create a plaster jacket, which holds the fossil together and protects it in transit, we’ll first dig a trench around the specimen to make a mushroom-shaped island with a moat around it. Then, we cover the surface with separator, usually paper towels or toilet paper, to prevent the plaster from sticking to specimens. We make mud with fine-grained matrix and little bit of water, and fill any gap or uneven surface so that the surface of the specimen is smooth. This makes it easier to peel off the field jacket when we open it back in the lab. Then we add plaster, fully covering the “mushroom cap” to create a partial field jacket. After we dig deeper and undercut the jacket, we can flip it over and free it from the ground. Because the amount of plaster, earth, rocks, and fossil can create a lot of weight, we reduce the jacket, or remove excess matrix from the underside of the jacket until you see some bones. Then we cap the underside with plaster to create a fully enclosed plaster jacket. Finally, we just have to wait for the plaster to dry. Water adds a lot of excess weight to plaster, so we want it to be as dry as possible before we attempt to pick it up and carry it over to the truck.
5. Pack up and go home
Especially if we have a small team working with a heavy jacket, we will strategize in advance how to move the jacketed fossil: we’re often working in hilly, rocky areas where it’s not possible to get the truck closer to the site. Once we get the fossil back to The Field Museum, it eventually goes to one of the fossil preparation labs. You can see some of this work in action in our McDonald’s Fossil Preparation Laboratory.


 to 2018 (right).")

